Since 1986 Experience Matters
Get-A-Quote or Call: +1 239.275.0425
How to Re-Texture Your Ceiling
Jan 22, 2019 -- Posted by :RESIDENTIAL • COMMERCIAL • INTERIOR • EXTERIOR • FAUX FINISHING in Southwest Florida.
Serving Sanibel and Captiva Islands, Fort Myers, Naples, Bonita Springs, Estero and Cape Coral, FL.
Don't forget to visit us on FACEBOOK!
How to Re-Texture Your Ceiling
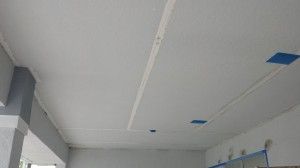
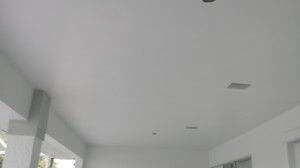
“The ceiling on my lanai is peeling (knockdown texture). I tried to scrape some of the peeling off and it came off clean to the sheetrock (gypsum board). I want to try to re-texture this myself. I have been practicing with joint compound and I am getting decent. Why is this peeling off? I don't see any mold. Could it be moisture from the pool? After removing the existing texture, what do I need to do before or after I apply my new knockdown texture (created with joint compound)?”
The first thing you want to do is to make sure there is no mildew on the ceiling. What I would do in wash down the ceiling with a light bleach and water solution, then rinse with clean water. Allow the ceiling to dry a couple days.
Be careful when doing this; the area where you are down to bare drywall should not get wet at all. You can point a floor fan up at that spot on the ceiling to help it dry faster if it does.
Following the ceiling cleaning, brush Seal Krete onto the area that is down to bare drywall. Seal Krete is a clear sealer and will make the area sound (it takes about one hour to dry). If the tape joints have come loose, pull off the tape joints and put the sealer where the joints are removed. Then, put fiberglass joint tape where the old tape joints were removed and apply joint compound to the entire ceiling. Depending on the size of the ceiling it will take approximately eight gallons of joint compound per coat.

Once the first coat is dry, apply a second coat of joint compound trying to make it as smooth as possible. The rougher it is, the more you have to sand it. Once it is dry, sand the ceiling either with a drywall sander or a vibrating sander (to speed up the process). Whichever you choose, be sure to wear a respirator and safety goggles.
Then, wipe down the entire ceiling with a damp sponge to remove the loose drywall dust and apply a skip trowel texture to the ceiling. Once it is dry, prime with a coat of Glidden's Gripper then apply a coat of Sherwin Williams Super Paint in a satin finish. You can purchase Seal Krete and Glidden Gripper at Home Depot and Super Paint at Sherwin Williams.

By Ron Rooker
President Ron’s Painting LLC.


 I'm Ron, with Ron's Painting. We look forward to speaking with you about your next project. Feel free to click the button below to give us a call.